Monday, September 27, 2010

A Step Back in Time

Over the weekend we took an enchanting trip back in time...
where early American Craftsmanship is celebrated and still practiced.
Ornaments and glassware are hand blown...
Blacksmiths hand forge horeshoes...
Baskets are hand woven
Artists and musicians play on the streets...
Gourds are fashioned into lampshades
Families are together, 
laughing and making happy memories...
There were many more early American crafts people and artisans making homemade apple butter, taffy, aprons, quilts, ice cream, beef jerky, knives etc....
Made me want to put on a pioneer dress and learn a craft!
We were blessed with the opportunity to visit Silver Dollar City, it was a blast!
Happy Fall Ya'll!
Hugs,
Olivia

Saturday, September 25, 2010

A Rose Chic Friend!

Don't you just love receiving presents 
~just because~.
My heart fluffed up with delight when I opened this sweet package from Lorena, over at
she sent me the prettiest hand painted rose O,
it found a home in my Shabby pink kitchen...
 She also included a handmade rose clay magnet that looks so cute on my Shabby framed tin...
Ohhhh, I just love these pretty in pink clay rose magnets! 
A perfect way to dress up any note!
You can find these one of a kind clay roses in Lorena's Etsy Shop
Thank you sweet friend!
While we are in my kitchen lets have a bite of the tasty chocolate cake I whipped up this week!
 
I rarely take time to bake up cakes from scratch. I use the box mixes from the store.  However, I did spice up my cake mix!
Make it Fabulous for Less Tip~ When your box cake mix says to add water, leave a little room in the water part to add your favorite flavored creamer ( I just used a couple of teaspoons). For this chocolate cake I used my Caramel Cream Delight! Yummy!
 I crafted up these cute pink cupcake tags for my booth, (I coffee stain all my booth tags) the cupcakes came out so adorable i decided to keep one for myself and dress up my cake plate!
Well my sweet friends, I am off to cruise and see some more yummy pinks! Thank you to our lovely pink hostess Beverly, 
http://howsweetthesound.typepad.com/my_weblog/
for hosting Pink Saturday!
 Have a beautiful and blessed day!
Hugs,
Olivia

Wednesday, September 22, 2010

Fabulous Birdcage Lampshade

Who would have thought...
a broken birdcage fashioned into a lampshade?
I have had this cool old birdcage~marked cheap~ with a missing top in my booth for over a year. No Takers!
I hauled it home with very little vision for it myself, except maybe the trash can!
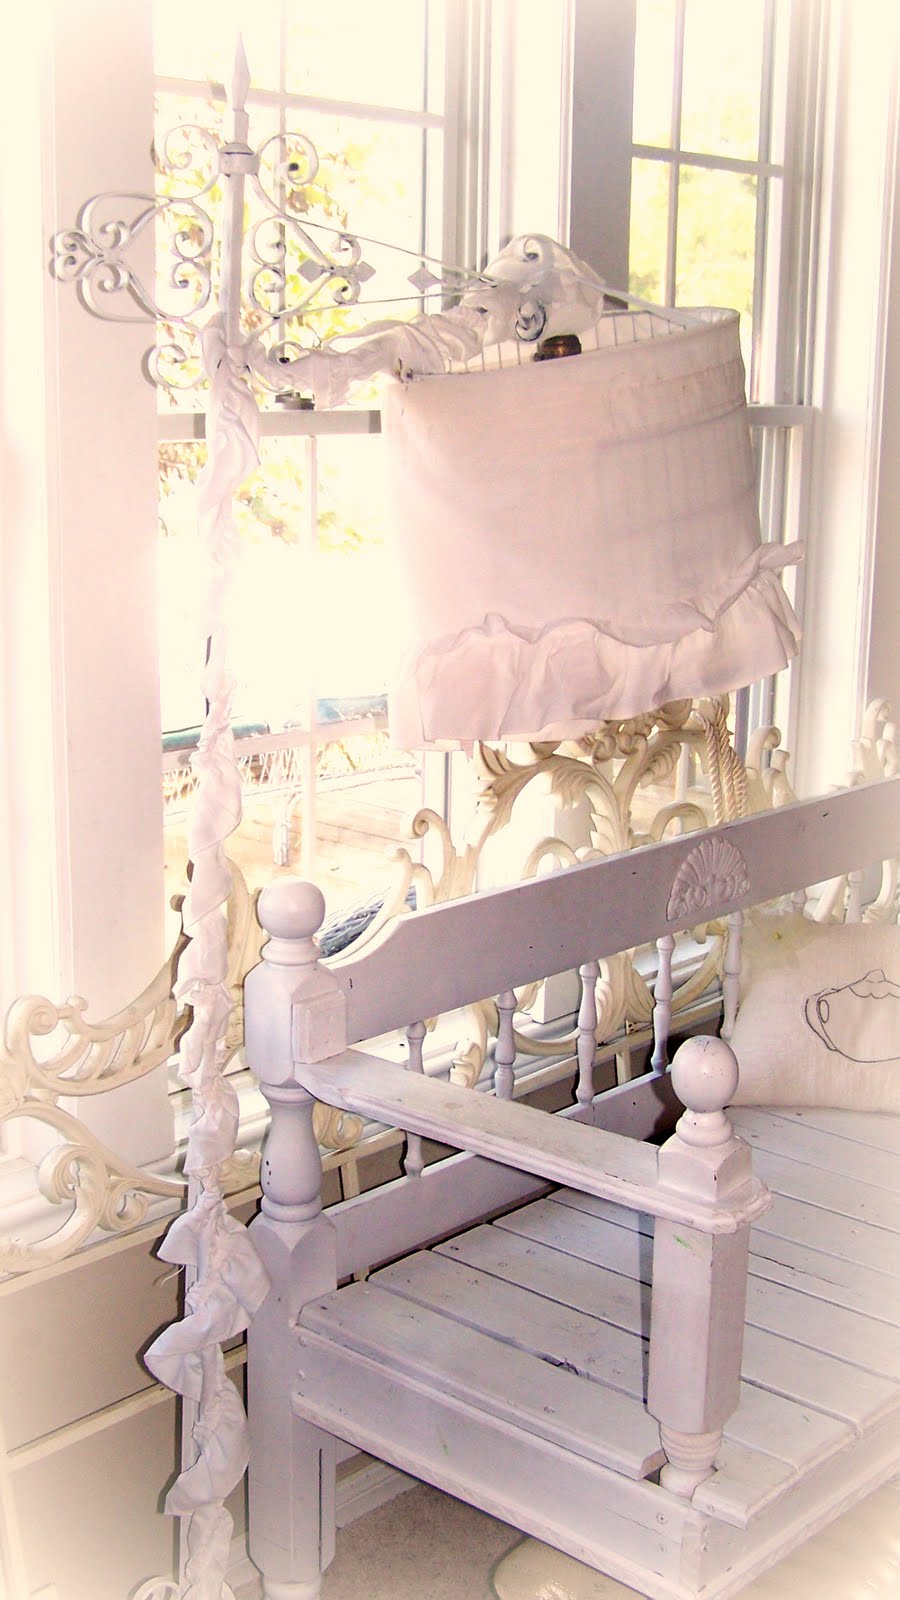
 I had my eye on a neat old black iron floor lamp with a terrible shade. I did some trading with a dear friend and ended up with this little project on my hands. I set to work shabbying the iron...with you guessed it, my white paintbrush. I used a stencil brush to paint this so I could get into the crevices....
I was playing around with an old broken birdcage and hung it on the end of the lamp to work on it and then realized it might just work for the lampshade. I tied the birdcage to the top of the lamp and then pinned a pretty ruffled valance around it! Waaa Laaa! An instant lampshade!
I realized there was a cord issue with this old lamp. The entire cord was exposed all the way to the shade. 
So, I used some white ruffled tiebacks and wound them around the cords.
 I found a home for this little beauty in my living room at the end of my Shabby bench.
Make it Fabulous for less Tip~
Get creative with the items you have laying around that are headed to the trash bin. 
Before throwing away a broken item, take a good look at it and make sure it can't be used for another purpose.  By removing the base of this birdcage, I was able to fashion it into a lampshade!
 I am partying with Faded Charm's White Wednesday
and
Brambleberry Cottage's Time Travel Thursday
Cindy at My Romantic Home
http://romantichome.blogspot.com/
Finding Fabulous Frugalicious Friday
and
Olivia

Monday, September 20, 2010

An Edearing Cherub

Hello Friends!
I was at a church fundraiser and I found this pretty cherub vase.
I was paying and the man helping me kept looking at this cherub and then looking back at me...he told me he had given this to his wife as a gift,the wife informed him she did not like cherubs. I felt terrible for the man as he seemed somewhat burly, and not one to buy a delicate cherub vase.
 I adore cherubs and told the man, I thought it was beautiful
Not only did I get a bargain on a darling vase I took the mans story as a reminder gift, that my husbands heart can be as tender as mine and to tread lightly.
As practical and unemotional as my own husband, Mr. Romantic, may seem, my actions and words have a deeper impact than I may realize. Ladies, tread lightly on your husbands hearts and be thankful when they do express themselves in a romantic way.
On a lighter note, 
I did have to fluff up the cherub vase with a wave of my magic Shabby Chic paint brush...

Make it Fabulous for Less Tip~I always keep a can of regular old Wal-Mart Latex paint around in white and antique white. I do alot of Shabbying items white and it is not cost effective for me to use spray paint on everything. Brush painting will save you alot of money in paint, try not to get frustrated, some items do take several coats with the brush.  Also, remember if you are distressing the item the paint job does not need to be perfect... a little messy is ok!

Since it is Monday, I think we need a little eye candy to get our day going!
And a strong cup of coffee to wake us up!
I am addicted to flavored creamers! 
My favorite right now is Carmel Vanilla Cream!
Yum!

Have a lovely and beautiful day! Don't forget to hug and kiss your sweetie! 
I am joining Cielo at 
Show off your cottage Monday
Hugs,
Olivia

Saturday, September 18, 2010

Shabby Chic Halloween

Welcome to a Shabby Chic Halloween!
Happy Pink Saturday!
I just adore reveling in such yummy pink goodness! 
Settle in and feast on some delightful pink eye candy!
For all of you pinky rose lovin gals with Shabfabulous homes go ahead and paint up some pink pumpkins!
There are several ways you can pink up some pumpkins! For my Jack O' Lantern I painted the whole thing white and then added pink stripes. On the top I painted roses and then sprinkled on some white glitter!
For this little pinky pumpkin below, I used a softer pink paint added a lace accent and then decorated up the top with pretty antique white roses. I use this little darling underneath my Christmas tree too.
While out tag saleing yesterday I found a darling bunk bed ladder for $1. I needed a creative space saving way to display linens in my flea market booth. I added lace and florals for more drama. 
Keep it simple or make it fluffy!
Make it Fabulous for Less Tip~ Look for wooden ladders you can paint and personalize for your space. Ladders are a fun way to display your favorite cottage quilt and dainty linens. Hang one from the wall if your space is small.
Happy Pink Saturday! 
Please stop by and see our beautiful hostess Beverly for more pink goodness!
http://howsweetthesound.typepad.com/my_weblog/
Squishy Pink Hugs,
Olivia

Thursday, September 16, 2010

A Fabulous Twist on your Fall Favorites!

I love decorating for the Holidays!
However, I have been craving a twist on the traditional fall decor!
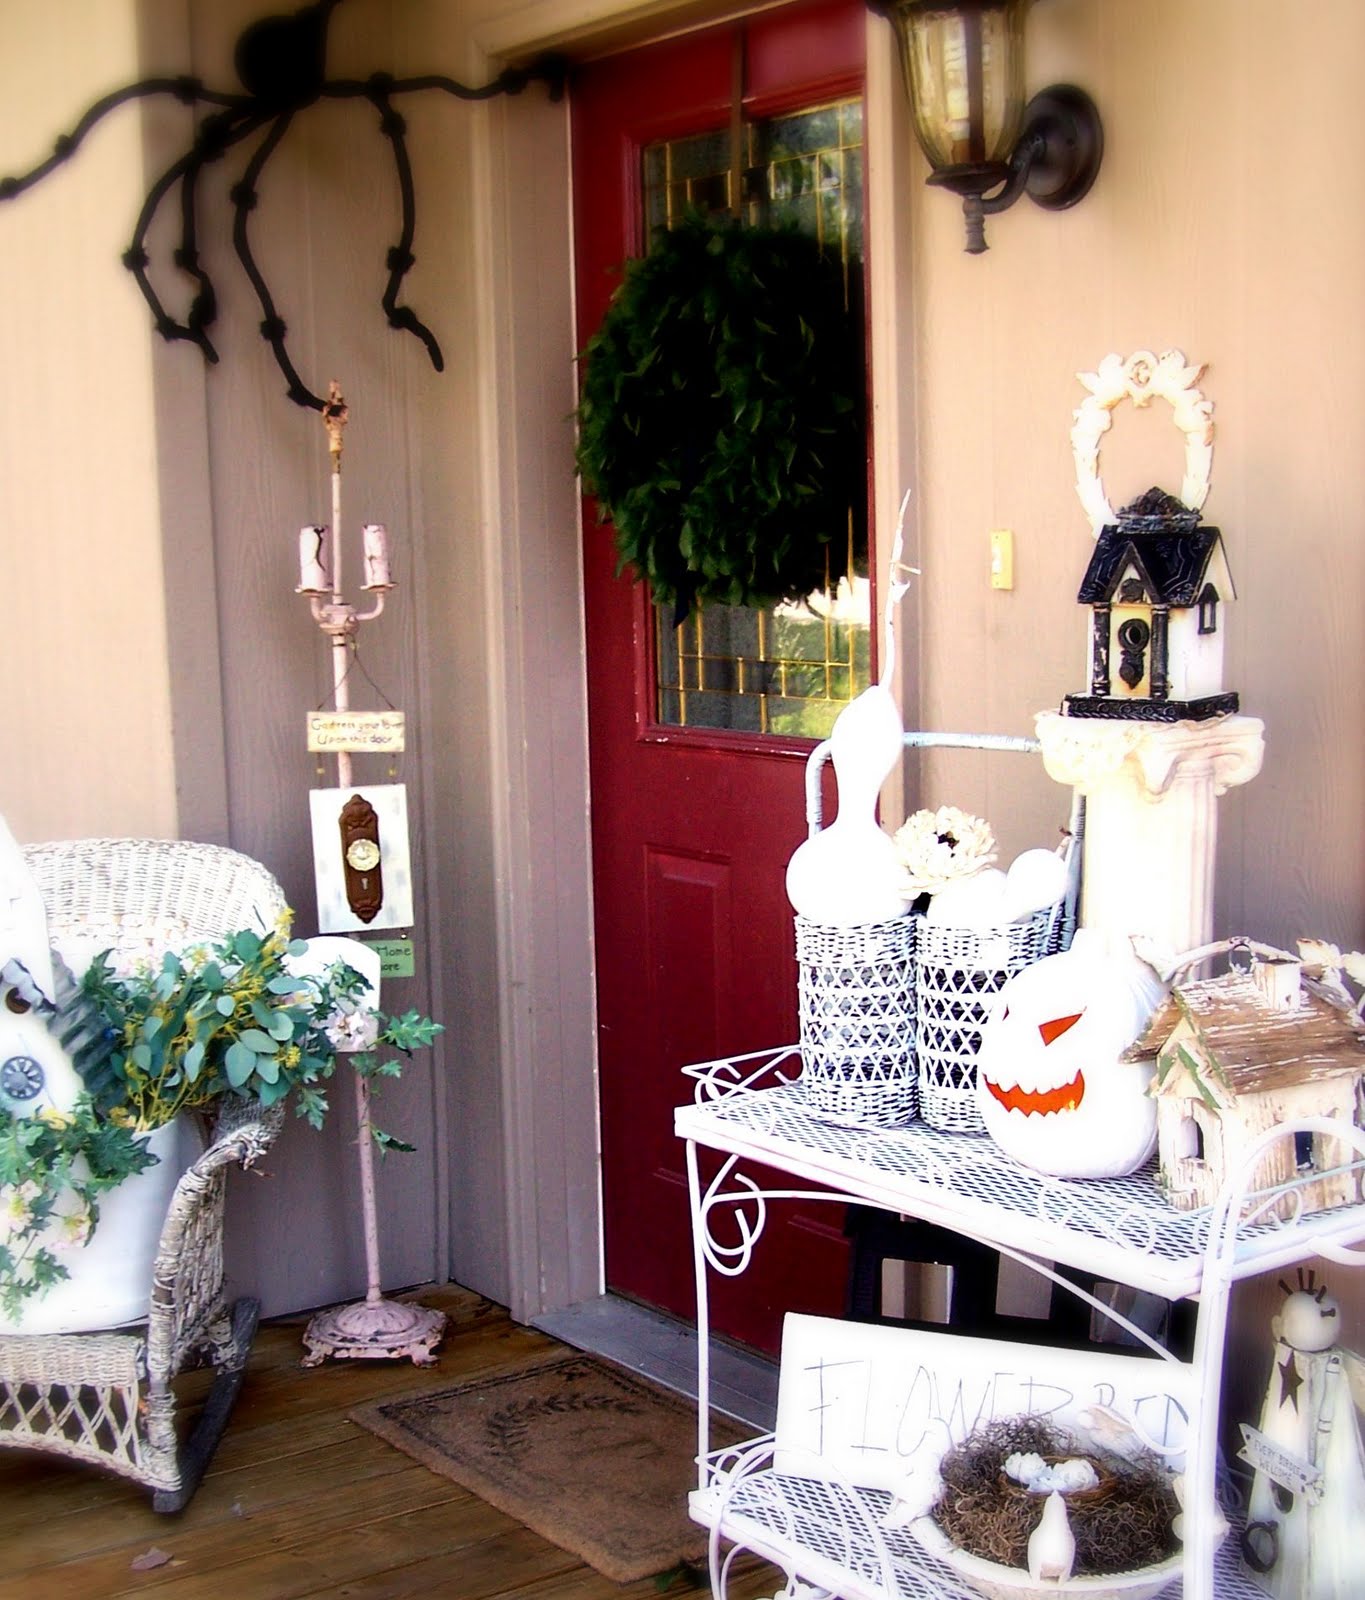
This is what I came up with for my front porch...
As badly as I wanted to go to Michael's Craft store and drop $100 on really cool Fall Decor, my tiny budget said
USE WHAT YOU'VE GOT!
So, I whipped out my can of white paint and got busy Shabbying the lighted pumpkin I already had. 
(The pink pumpkins I leave inside they have more detailed painting and I will show you more pink on Saturday.)
I also slapped a coat of white paint on my basket and the gourds to help them blend.
 Underneath I added my spooky black house, a thrift store find,painted black with a shabby birdbath.
On the front door I used a fabulous feather wreath I found last season at a garage sale for a couple of bucks and tied a black ribbon at the top to give it a little spook effect! Yummy!
I had a leftover spider from my sons costume several years ago, I hung him in the corner.
 To the left is a chippy very old wicker rocker with no seat.
To re-purpose this rocker, I added a board to the bottom so I could fluff it up with a cheese box holding a birdouse and lots of faux greenery!
Make it Fabulous for Less Tip~ Look for neat old chairs without their seat. You can find them super cheap in flea markets, thrift stores and abandoned next to a trash can. Seatless chairs make fabulous outdoor holiday displays! They can be painted and fluffed to match your favorite time of year!
 Don't ya just love new twists on an old holiday favorite!
Well friends, I hope you have a lovely day!
Smile and be a blessing to those that cross your path!
This week I am so excited to be partying with the 
The Shabby Chic Cottage for Transformation Thursday
http://www.theshabbychiccottage.net/ 
Time Travel Thursday at the Brambleberry Cottage
and 
Romantic Homes Show and Tell Friday
Hugs,
Olivia

Search This Blog